Reply With Quote
looks really good, and that is a really decent price for a 3 step + clay.


 5-10 Grand Master

So this is my day off from having to do something! The past three weeks I have not had an open weekend day, so here it is. I woke up and washed the car with dish soap to strip the wax and crap on the car since last summer. I washed it maybe once or twice since december and the car was pretty nasty.
After washing it down with dish soap, I clay barred the car using mother's clay kit. Then, I used the pre-wax cleaner, which is the first step of their suggested 3 step phase. Immediately after using the cleaner, I noticed how soft the paint was after having clayed and using the cleaner. This cleaner makes it really easy to remove any water or clay spots that may have been left over - awesome step.
Then I did the "sealant" glaze and the paint felt so soft and smooth to the touch. I almost feared putting on the top wax because I have been at this point in the past and waxed it to find that the wax didn't come up so well, and I regretted it.
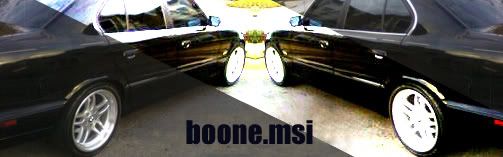
Nonetheless, I applied the liqui carnauba wax and pulled it off after about 10 mins of hazing. Simply awesome.
I have used the Zymol stuff, P21s/S100 stuff, etc., and yes they work etc, but they are expensive and a bitch to buff out. This was $40 for the 3 bottles of step agents (cleaner/glaze/wax) and the clay kit. Not bad. I think I will use this process on our other E34 as it desperately needs it!
Ignore the vinyls, thats from our big meet a couple weeks ago.
Yes, I have other rims (17x10's) that I am curently refinishing.
2 Grand Master
looks really good, and that is a really decent price for a 3 step + clay.
Major Contributor
nice, just detailed mine today aswell.
1995 BMW 530ia/3.15lsd/M Parallels/Eibach/Bilstien/Magnaflow
Big, Big Time Poster
Detail day here lasted 2 days, and I'm not even close to finished.
Step one was a thorough wash with Dawn detergent.
Step two was the mothers clay bar kit. Used all of the quick-detailing spray supplied as lube before I had finished the whole car, ended up using a mix of Dawn and water. Re-wash.
Step 3 was 3M Perfect-It 2 rubbing compound with a yellow cutting pad on my brand new Porter Cable 7424 dual action variable speed polisher buffer. Since I have no real shade, and my garage is still full of crap from the move, I had to keep spinning the car away from the sun. I did the drivers side first. 3/4 of the way down the side, the yellow pad explodes in two pieces. ****ity ****. 3 pm on a saturday, nowhere to get another pad. I ended up at my friends place where he does custom paint for motorcycles and cars. Thank God for him. He is a super guy. Gave me his rotary 9 inch with a fresh cutting pad to use. My friggin hero. Had the car rubbed out in no time. Well, by about dusk anyway.
Step 4 Maguiars swirl remover #9, 3M polishing pad on the Perfect-It III backing plate with hook and loop fastener system on the Porter Cable. I picked an area of the hood that need it most. As soon as the swirl remover started to set up with the buffer, zoom! there goes the pad like a frisbee over the neighbors fence. So much for the hook and loop system. I struggled to keep that frigging thing on the backing pad. Every couple revolutions the pad would slip away. I was getting about 5 - 10 revolutions per minute. I am glad it's a DUAL action buffer.
Step 5 Maguiars #26 yellow carnauba.
Damned she looks sweet.
Maybe someday I will get a chance to do the roof. ROFL!!!
I'm working on pics, so hold yer arse.
six forward speeds
Big, Big Time Poster
pics...
1st pic is... nice gloss.
2nd pic.. Brosher would know. Passenger rear door through fender about trim height there is an area of real bad paint. It came out great. i am real happy there. It will need another going over, but I need to restock my stuff. Rethink my pad setup. 25 bux for that 3m plate. Pfft. I need to go Lake for pads.
six forward speeds
Big, Big Time Poster
I washed that car no less than 4 times in 24 hours. The dust from the rubbing compound is everywhere. Under the hood, in the door jambs. In my hair. It needs another after the lousy trip to Toronto for the MaxBimmer cruise. But that's another thread.
Reminder to tape the trim better. I burnt the bumper with the side of the polisher.
six forward speeds
Major Contributor
Dam, that is shiny. Now wash that windshield. That paint is a respray right?
FS: PBR Deluxe rear brake pads [new]
Grand Master
Looks perrty
Me toonice, just detailed mine today aswell
InDEuroz | e34 540i/6 '94 w/ bore/stroked m62 | e30 325iS '87 | Ducati 748R '00
Whacha got planned for the wheels being refinished?
Big Time Poster
I was thinking.. wow.. you really need to repaint the the rear bumper...too many rock chips.Originally Posted by Jon K
then...
OMG... that's the reflection of the ground!!!!!
VERY NICE job!!!
 Posting Permissions