GO FISHING, use SLABSAUCE Fishing Attractant
Results 1 to 3 of 3

Thread: Babaria C Professional RDS fix. ...

  1. #1
    Join Date
    Jan 2004
    Posts
    1,342

    Default Babaria C Professional RDS fix. ...

    This weekend, for the third time, I decided to take care of the burnt out LED's of the backlight on the panel of my radio head unit. The first two times, I only replaced the burnt ones, now, I decided to replace them all (29 units total).


    First thing to do is remove radio head unit from the dash, mine, have the two screws holding it in place, but different as said in the forum, mines are hex and a 3/32 bit work fine to loose them.

    Second step is to remove front assembly from the radio, need loosing two screws, one small Philips at the side of the unit (it's a tricky one, if not loosed you may damage the assembly pulling it out), the other is a torx screw at the front. Picture shows locations:


    Then, you must remove the liquid crystal displays and the buttons assembly from the printed circuit boards, careful when removing the button assembly not to loose the metal triangle shaped contacts, also need to de-solder the points indicated in the picture:


    also loose all the torx screw holding the circuit boards to the liquid display and button assembly. This picture shows location for must of them in a red circle (sorry, screws already removed, note location of the long ones, the medium ones and the small ones)


  2. #2
    Join Date
    Jan 2004
    Posts
    1,342

    Default 2nd part ...

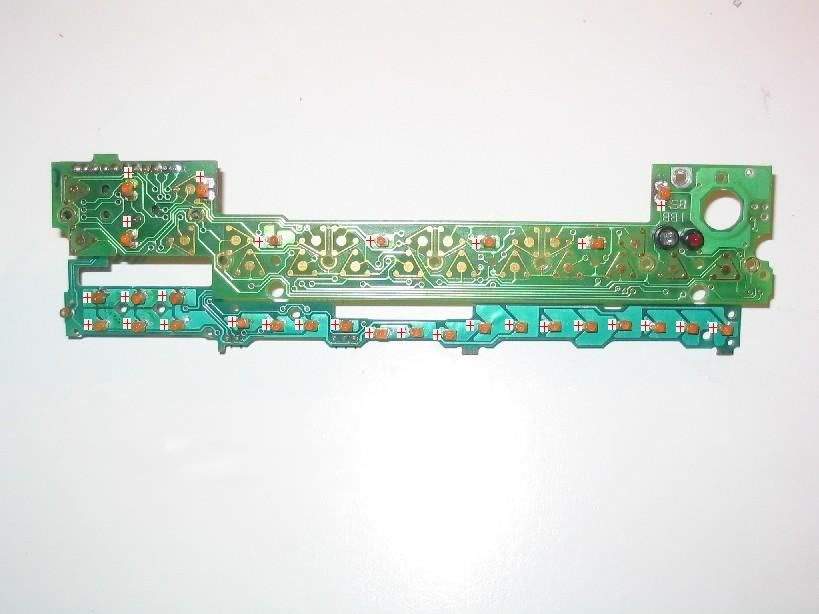
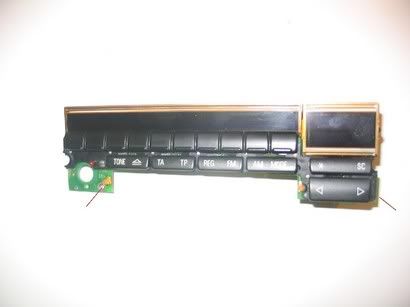
    Once you have the boards apart, replace all the orange LED's, careful on polarity! I marked the positive side (long lead) with a red cross on the next picture showing finished job.


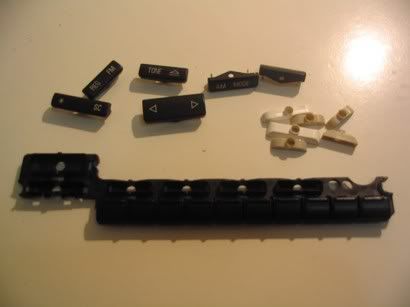
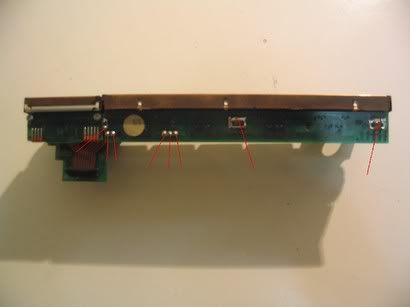
    Now replace / re-solder the liquid displays and prepare the button assembly for reassemble as follows: Remove all the rocking buttons from the assembly and also its white plastic light reflectors (see picture). Attempting to re-assemble the button assembly without doing so is almost impossible.


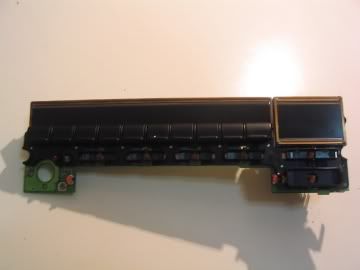
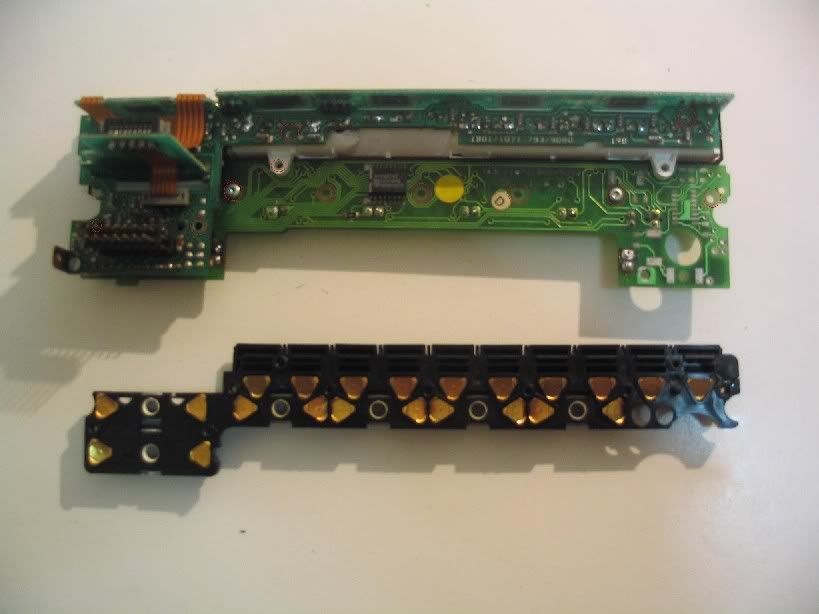
    This picture shows the triangle shaped metal contacts in place, ready to re-assemble in the boards. Just set the boards in top of the black button assembly and tight the screws.


    This is the result before re-installing the white reflectors and the rocking buttons.


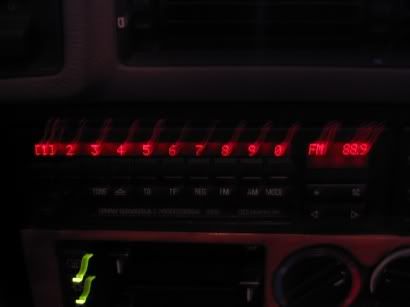
    Install the reflectors and the buttons, then replace the front assembly in the head unit and install in the car.
    Last edited by Javier; 01-29-2006 at 09:28 PM.

  3. #3
    Join Date
    Jan 2004
    Posts
    1,342

    Default The end ...

    This is the result:


    As may be seen, the LED's I got are a little bit reddish (don't like them) but were the only available, as soon as I get the chance, I will buy true orange 3 mm LED's and re-do the job.

    Javier

Similar Threads

  1. i-pod or MP3 player with Bavaria C Professional RDS
    By zibello in forum 5 Series BMW
    Replies: 0
    Last Post: 07-13-2006, 01:57 PM
  2. i-pod or MP3 player with Bavaria C Professional RDS
    By zibello in forum 5 Series BMW
    Replies: 0
    Last Post: 07-13-2006, 01:56 PM
  3. Replies: 8
    Last Post: 05-29-2006, 07:57 PM
  4. OT: For any professional mechanics, ECU downloading questions
    By DanDombrowski in forum 5 Series BMW
    Replies: 2
    Last Post: 07-17-2004, 07:37 AM
  5. HELP! ETK install with XP Professional?
    By Triton540i in forum 5 Series BMW
    Replies: 4
    Last Post: 03-18-2004, 01:39 PM

Posting Permissions

  • You may not post new threads
  • You may not post replies
  • You may not post attachments
  • You may not edit your posts
  •